Recovering Lost Memories: Hard Drive Forensics with a Raspberry Pi

When disaster strikes in the form of a hard drive failure, the sinking feeling of losing precious photos, videos, and important documents can be overwhelming. Recently, I faced this very scenario. Armed with a Raspberry Pi, some forensic tools, and a bit of patience, I embarked on a mission to recover my data. This post walks through my experience, including how I adhered to forensic best practices to ensure the integrity of the data recovery process.
The Situation
My trusty external hard drive had started making ominous clicking noises, and my computer could no longer read it. This was the home of cherished photos and vital documents. Fortunately, the data was still physically present on the drive. My challenge: extract it safely without causing further damage.
Setting Up the Recovery Environment
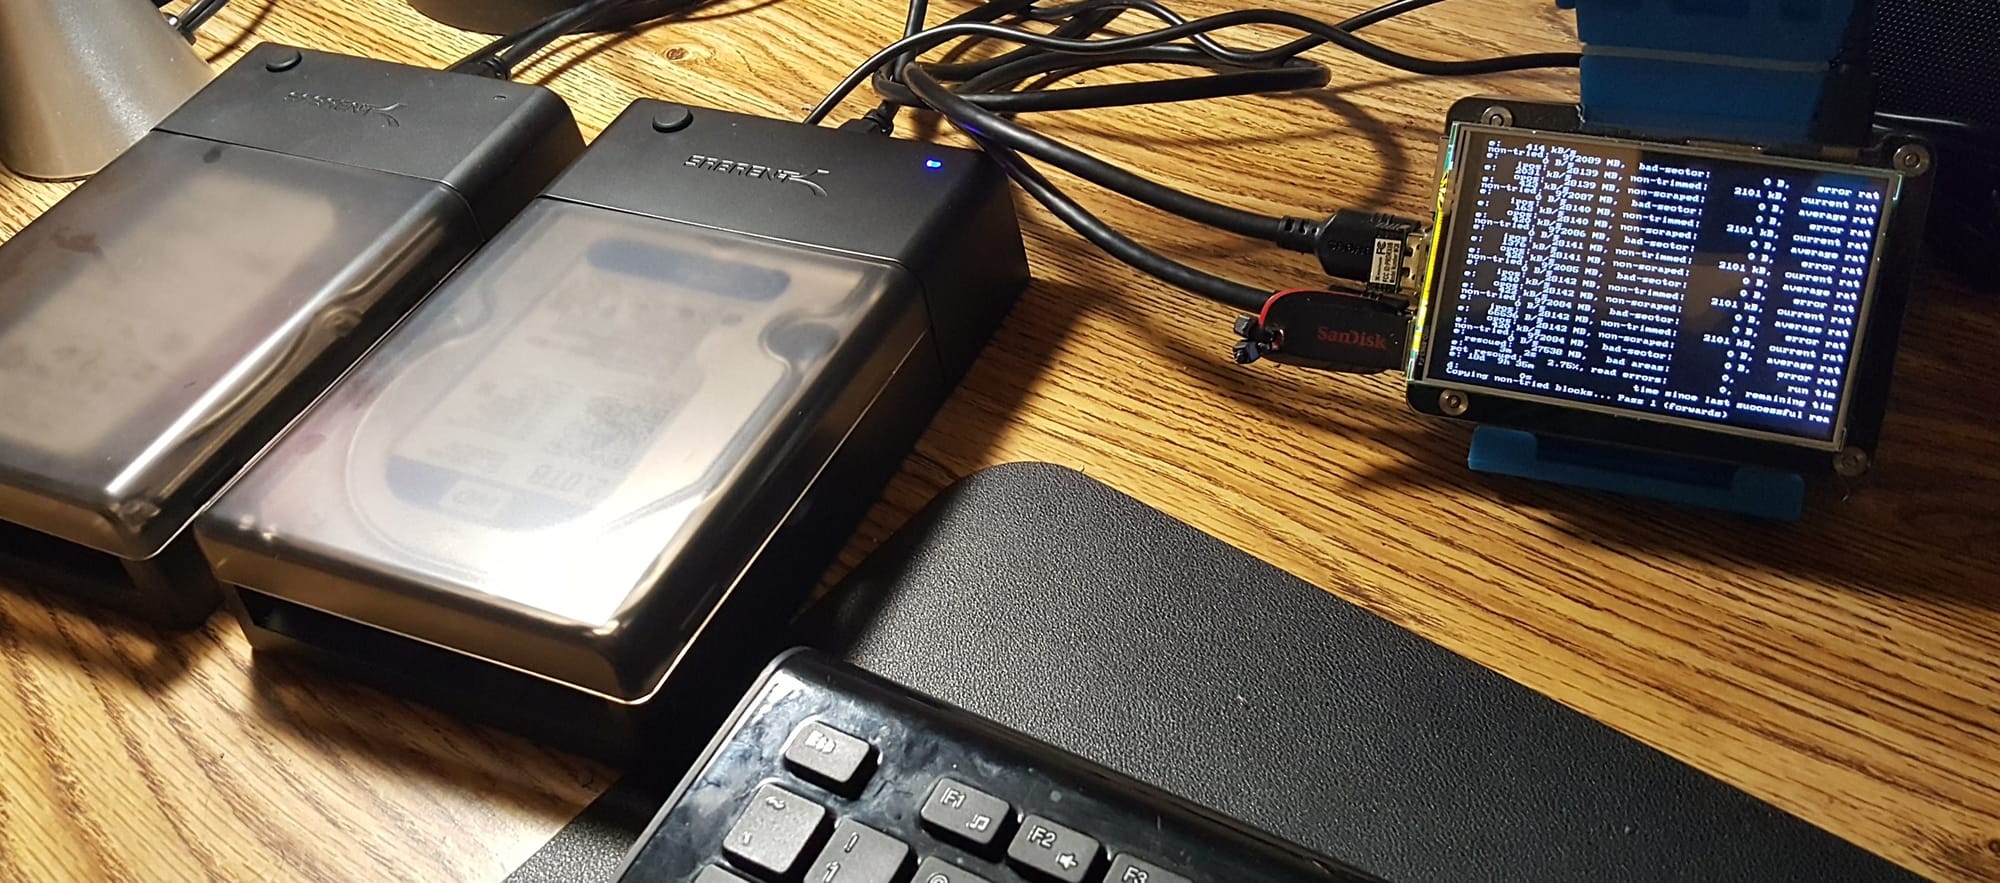
To avoid accidental data loss or corruption during recovery, I followed digital forensic procedures. My setup included:
- Raspberry Pi (Model 4b): A small, versatile computer that I used as the central workstation, the reason for it instead of my regular laptop, is that the recovery process could days or maybe weeks. I needed a device to be on without moving for several hours.
- Two 3.5-inch HD Enclosures: One for the failed hard drive and another for the destination drive.
- Foremost: A powerful open-source tool for extracting files from binary data.
- USB Drive: Dedicated to storing progress and error logs.
Step 1: Making a Bit-by-Bit Copy
Forensic methodology dictates that the original drive must not be written to under any circumstances. To adhere to this, I created a bit-by-bit image of the failed hard drive. This ensured I was working on an exact replica, preserving the original drive's integrity.
Commands Used:
Using dd, a command-line utility for low-level copying, I created the disk image:
sudo dd if=/dev/sdX of=/mnt/backup_drive/disk_image.img bs=4M conv=noerror,sync status=progressif=/dev/sdX: Input file (the failing hard drive).of=/mnt/backup_drive/disk_image.img: Output file (the image stored on the second drive).conv=noerror,sync: Ensures the process continues even if bad sectors are encountered.
I mounted the second enclosure as my backup destination to store the disk image. Throughout the process, I saved detailed logs of operations and errors on the USB drive for future reference.
Step 2: Analyzing the Disk Image
With the disk image safely stored, I turned to Foremost, a tool designed for forensic data carving. It works by analyzing binary data patterns to extract recognizable file types.
Installing Foremost on the Raspberry Pi:
sudo apt install foremost
Running Foremost:
foremost -i /mnt/backup_drive/disk_image.img -o /mnt/usb_drive/recovery_output
-i: Input file (the disk image).-o: Output directory (where the recovered files would be saved).
Foremost began scanning the image file, identifying fragments of photos, videos, and documents based on their headers, footers, and internal structures.
Step 3: Organizing Recovered Files
The output directory quickly filled with subfolders containing various file types (jpg, mp4, doc, etc.). I reviewed these files, cross-referenced them with logs, and began piecing together what I had lost.
Challenges and Solutions
- Bad Sectors: The hard drive's physical damage resulted in some corrupted areas.
- Solution: Using
conv=noerror,syncwithddallowed me to skip bad sectors without halting the recovery process.
- Solution: Using
- File Fragmentation: Some files were incomplete or corrupted.
- Solution: I used additional tools like
photorecfor deeper data recovery.
- Solution: I used additional tools like
- Slow Processing: The Raspberry Pi, while capable, wasn’t the fastest.
- Solution: I let the operations run overnight and monitored progress logs stored on the USB drive. The whole process took about 2 weeks.
Lessons Learned
- Backup Regularly: Avoid this nightmare by keeping regular backups.
- Follow Forensic Protocols: Working on a disk image instead of the original drive protects your data from further damage.
- Small Tools, Big Results: The Raspberry Pi, paired with tools like
ddandForemost, is surprisingly effective for forensic analysis.
Conclusion
Recovering data from a broken hard drive is a meticulous process, but it’s achievable with the right tools and mindset. Thanks to the Raspberry Pi and open-source software, I was able to rescue many irreplaceable memories. If you’re facing a similar situation, don’t rush—take your time, follow best practices, and remember that patience pays off in the end.